Saturday, September 5, 2015

Grace Like Rain

 
Grace Like Rain
 
I'm sure you've all heard Amazing Grace before, but have you heard Todd Agnew's version called "Grace Like Rain"?  It's one of my husband's favorite worship songs, and I can understand why.  In the song, Todd Agnew alternates between lyrics from "Amazing Grace" and his chorus:

And Hallelujah, grace like rain
Falls down on me
And Hallelujah, all my stains
Are washed away, they're washed away

I just can't explain how the blend of these new and old lyrics with Todd Agnew's gritty voice just form this incredible song, so you must listen to it if you have never heard it! 

So what is grace exactly?  Ephesians 2:8 says, "For by grace you have been saved through faith.  And this is not your own doing; it is the gift of God."  Grace is a gift from God; it is His unmerited and unconditional love and favor towards us.  When we mess up, when we don't feel like we could be loved or worthy, God still rains His grace down on us.  

Paul goes on to state in Ephesians 2:9, "not a result of works, so that no one may boast."  So God's grace isn't any result of my own actions.  And I'm so glad about that, because if I'm going to be honest, sometimes my actions should not warrant God's grace.  But that's the beauty of His grace is that even when I shouldn't deserve it, I still receive it.  So when I mess up (which let's be honest is a dozen plus times in a day, and half the meaning behind my blog's name), God still showers me with his grace.

And Hallelujah, I'm so blessed that God's grace rains down over me like rain!

Friday, August 21, 2015

My Bible.. So far

I created a video with Flipagram of the pages in my Bible that I've journal so far.  I hope that you enjoy looking through it.  Below the video, I'm sharing a view thoughts that I'm having as I'm reflecting on my Bible journaling experience so far.
 

So as I looked through this video of all my Bible journaling pages, this is what I noticed:

  • I don't really stick to one style of type of medium.  I like variety.  I think that's why I became an elementary art teacher.  I never really had a stand out favorite art media; I loved to do everything! 

  • I gravitate to journaling in the New Testament pages the most.  I've done a few Old Testament pages, but not nearly as many.  I think that's because I'm not quite as confident in my knowledge/interpretations of the Old Testament, so that may be an area that I need to grow in over the next year. 

  • I recognize the HUGE difference in the quality of my first pages compared to my most recent pages.  I felt as though I struggled much more to find an idea of how to illustrate my pages, and now my ideas generally come pretty naturally.  I think that part of that is attributed to just creating more art.  I remember when I took art classes in college, I just felt so much more creative, because I had to be in that mindset.  When I'm working with my students, I'm investing so much in myself that I don't always get to stop and create something that I want.  The other reason that I think it's getting easier to journal in my Bible is due to the amazing products that I've purchased from Illustrated Faith.  Each month, Illustrated Faith produces an amazing stamp set and devotional by an artist, which is available to purchase on their Etsy shop.  The devotionals give such encouraging words and testimonies, and the stamps allow you to create your pages a bit more quickly!  I also broke down and purchased the Illustrated Faith Genesis Kit from Bella Blvd.  The kit features some cool tools; alphabet stickers in various different colors and fonts; and stickers with words, labels and tabs.  I honestly debated buying this kit for a month, because it was a bit pricey, but once again, it has an amazing little devotional and it enables me to create a page much more quickly.  I'm thinking that I'll be using this kit much more throughout my super busy school year!

  • Finally, my favorite thing as I reflect on my Bible journaling experience so far is that I have someone talk to me about my pages everyday.  And I'm not getting all excited just to be getting compliments about my art, but I'm getting excited because I'm able to worship my God and share it with others.  If you know me, then you know that I'm a quiet person.  I'm not one to vie for the spotlight and speak my mind, but my Bible journaling experience has given me a voice to talk about my faith in my own way.  I feel so honored to know that my experience is inspiring others to buy journaling Bibles, begin reading in the Word, and creating art.  God is so good, and I've felt so blessed through this journey so far. 

To close this post, I'd like to hear comments of any of my Bible pages that you'd like me to do a future post about.  I'd love to share with you my supplies, techniques and thoughts behind any of these pages!

Friday, August 14, 2015

Genesis


Genesis: the origin or coming into being of something
 
I want to take a moment today to talk about how I started my Illustrated Faith journey.  It goes back to over a year ago when my husband and I finally found a new church tome.  After not really going to church for over a year and losing my Grandfather, I was really wanting to find a church home to get reconnected with God and other believers.
 
After a bit of searching, we finally found a church in our hometown.  We attended semi-regularly for a few months and then when I started going through some tough times at work, I dug deeper into the church and we became regular Sunday attenders and then partners.  Our church is so awesome and between our pastors and members, they certainly push you to grow in your walk with Christ. 
 
Over the next few months, I grew to read the Bible daily, join a small group and start a discipleship program with an amazing lady.  I stumbled across Illustrated Faith in Instagram in early March.  I feel in love with the beautiful lettering, illustrations and art that these women were creating in their Bibles.  I let a lot of excuses keep me from getting started for a while (time, supplies, confidence, etc.).  After weeks of God working on me to help me realize that I could (HAD TO) do this, I finally bought my journaling Bible the day before Easter.  I created 2 pages that weekend and I was hooked! 
 
I really enjoyed looking for my next page to journal and gathering supplies, but I still felt like I was lacking time and confidence in my creative process.  Once summer break started, I had tons of time on my hands to play and create in my sketchbook.  I began with a lot of copying, practicing lettering, and just playing with my supplies.  For a while, I wondered if I could ever come up with my "own" designs and ideas.  Then finally one day it just happened.  I saw inspiration in the most unexpected places and found that I could just open my sketchbook and start creating without browsing through Instagram or Pinterest beforehand.


So my advice to someone thinking about taking this journey (or just getting started) is to begin!  Yes, you will make some "ugly" pages in the beginning and you will make mistakes with your supplies, but then you will hit your creative stride or find your style and it is so much fun to glorify God with your artistic talents.
 
With the next school year getting ready to start back up, I'm working on figuring out how to set aside my Bible journaling time.  I don't want to get too busy and not have time to create.  I'm hoping that with what I learned this summer and my awesome Illustrated Faith Genesis kit, I can still continue to create beautiful pages and worship God even during my busy, messy, crazy school year!


Monday, November 17, 2014

I Quit Sugar Pumpkin Pie with Cream

I love pumpkin pie.  Always have as far as I can remember.  Even back when I was suck a picky eater.  I always saved plenty of room for pumpkin pie on Thanksgiving.

So imagine how elated I was to see a pumpkin pie recipe in Sarah Wilson's I Quit Sugar book.  I could quit sugar, get healthy and STILL enjoy pumpkin pie on Thanksgiving!  Perfect!

I decided I needed to test this recipe before Thanksgiving just in case...

....And boy was I glad that I did! 

My 2nd pie after cooling and refrigerating overnight.
 
While I devoured the first piece, I quickly realized that there was something "off" about the recipe.  Of course, this isn't your typical pumpkin pie.  Almond meal replaces a pie crust filled with white flour and Crisco.  And while I absolutely love this crust, I had used salted butter, and with the added teaspoon of salt, it was way too salty.  The spices were unbelievably potent; almost masking the creaminess of the pumpkin, which we can all agree is not okay.

So after requests more from others to try the pie, and my curious mind wanting to perfect this recipe, I decided to test the recipe one more time before our big Thanksgiving feast...

...Of course, I tasted the batter before baking the pie and it was really great!  I could taste the spices, but they were no longer overwhelming; the pumpkin taste came through so much more.  I will also admit that I licked the extra batter out of most of the mixing bowl.  The crust is still a bit too salty for me, but I just love the use of almond meal to create a delicious, crunchy crust!

A slice of pie with homemade whipped cream.

So here I'll provide you with a link to Sarah's Wilson Pumpkin Pie with Cream.  But please, take my word for it and make these simple swaps and I think that you'll be very happy:
  1. Be sure to use UNSALTED butter for the crust.
  2. You may want to omit the teaspoon of salt for the crust as well, especially if you're not a big salt lover.
  3. Cut the amount of fresh grated ginger to 1 teaspoon.  I found the whole Tablespoon that they called for is way too spicy!

Let me know if you made this pie for Thanksgiving!  Did you make the same changes I did?  Was anyone surprised that it's sugar free?

Monday, September 15, 2014

Sugar Free Breakfast

Of course, cutting out sugar had a large impact on my diet, but the biggest changes were in my breakfast foods.  Think about it: Most breakfast food choices contain some sort of sugar.  Cereal, granola, yogurt, smoothies, pancakes, waffles, muffins... We have been almost programmed to start our day right off with the sweet stuff!  If you're interested in jumping on the sugar free train with me, then here's some new (better) breakfast foods to kick start your day!

Plenty of Time
Whether it's the weekend, summer, or I'm feeling a bit ambitious and wake up early, I love making these foods for breakfast:
  • Scrambled eggs with either a couple slices of bacon or turkey sausage patties
  • Protein pancakes
  • Green eggs (This is such a fun take on scrambled eggs; you'll love starting your day off with something green and the parmesan cheese!)
  • Cherry Almond Green Tea Smoothie Bowl (I use full fat yogurt instead of nonfat as suggested in the recipe)

On the Go
When I've just got to get out the door in the morning (which sadly is most weekdays during the school year), there's are my go to grabs:
  • Coco-Nutty granola (I almost always have this prepared to put on yogurt or eat with almond milk)
  • Ezekiel bread sprinkled with Stevia and cinnamon, and topped with full-fat organic cottage cheese
  • Ezekiel toast or a rice cake topped with almond butter
  • Green juice (When I make a big batch, I'll put a serving or two in a Mason jar to easily grab in the morning

Saturday, August 2, 2014

Art Room Tour


I'm an art educator.  I teach elementary art.  And while there a days that I feel completely defeated by my job (who doesn't?!), I love it when I think about the fact that I get paid to cultivate a love of art with students and create beautiful things all day long!

I will try to periodically post lesson plans and resources for art education, but since it's summer, I will share some photos from my art room. 


Here's a little information about my school:
  • This will be the 6th year that our building is open, and I have taught at this school since then.
  • They actually remodeled our school last year, and I got a completely new art room.  We also have 2 art rooms in my school, but we do not yet have enough students to hire a 2nd art teacher (Boo!).
  • My principal is awesome, and asked them to paint my room when it was added on last year.  I had to choose between 5 colors that were already in our school.


Decor in my previous room.

Close up of my window coverings. 
 I simply sewed together bandannas and attached them to the blinds with Velcro.


My husband got me all of these purple and orange pieces when he worked at Petsmart.
I created a secondary color scheme desert scene above the cabinets.

Of course, I had the primary colors represented with these crayon "piggy banks".

I used fake flowers and painted terra cotta pots to show complimentary colors.

I made this awesome rug cover with bandannas.  Unfortunately, I did not survive the year so well.

Before photo of my "new" art room from last year.

The back wall of my room.

The door is to my storage closet, plus sinks and cabinets.

The front wall of my room, including projector screen, whiteboard and a bulletin board.

And the after, thanks to a lot of help from my Dad and husband!


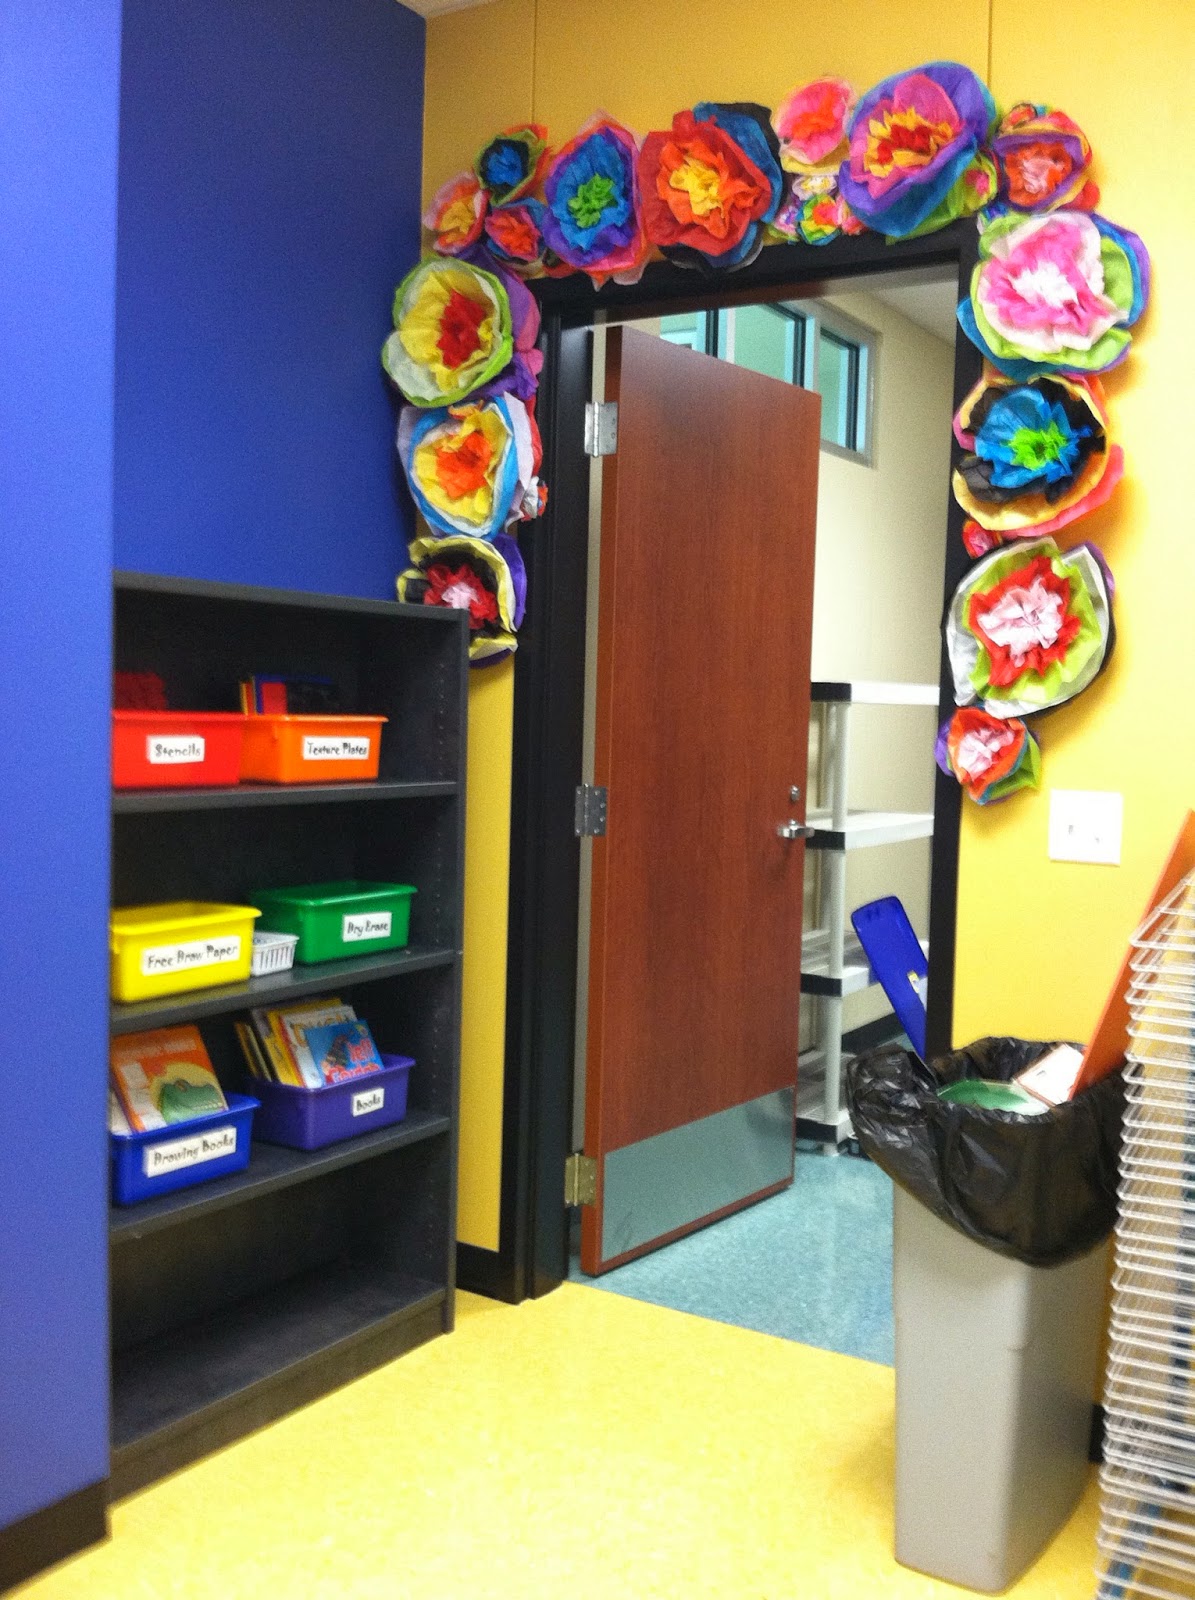
I made these tissue paper flowers for our wedding reception party and reused them around the doorway in my classroom.  They've held up really well, and the kid don't really mess with them.

I reused the complimentary flower pots from my previous room.


...And the window coverings!  I found these papel picado banners in San Antonio.


After all of the moving, unpacking and redecorating last summer, I don't plan on making too many changes in my room with year except for the bulletin boards and table arrangement.

I hope you enjoyed the tour of my art room(s)!  I will try to post some more close ups and techniques that I use in future posts.


Friday, August 1, 2014

Scrapbooking

I love scrapbooking!  I like preserving my photographs and memories in a beautiful way for myself and others to enjoy.  I think that I started scrapbooking in high school, but I always loved documenting my life even before I began scrapbooking.  I always bought those interactive books that you could fill in with information all about you. 

This is from a high school senior year album.

The Beginning
My first scrapbook was created out of a sketch journal that I had.  It was incredibly primitive form of scrapbooking.  I'd cut around the people in the photograph, attach it to colored cardstock and stick it in the book with a title and some journaling.  While it was not beautiful looking back, it was a start!

I created this layout the summer after my senior year.

I remember when I found a scrapbook store in a nearby town and loved shopping there.  I'd spend most of my high school summer job paychecks there.  I gradually started to use actual scrapbooks, designer papers and eyelets and brads (they were very popular at the time, and a pain to add to your pages!).  I also started collecting enough supplies that I needed organizers for it all.  I pretty much would create 1 new scrapbook, which documented a year's worth of photos.

By college, I got a lot fancier with my scrapbook layouts.


Mini Albums
Then I started creating (and still do!) mini albums of specific trips or themes.  I enjoy picking up lots of coordinating paper and supplies and putting a few photos in whatever beautiful little album that I can find.  I really love mini albums, because as opposed to my yearly scrapbooks - I generally finish these albums.  Sometimes my yearly albums sit around for months - or sadly, years - until they're finished (and my husband loves pointing this fact out!).

A mini album of a trip and December Daily.

The Problem
Then something happened when I got an iPhone... I was taking a lot more pictures of everyday things.  Having a camera at your fingertips is a pretty amazing thing, but it became increasingly more difficult to scrapbook.  I had too many single picture layout, and I was losing interest in scrapbooking these layouts.

Here's a layout that I created which had multiple "everyday" pictures.

The Solution
It's called Project Life.  It is an incredibly new and interesting challenged in scrapbooking that I'm taking on this year.  I really enjoy it, because it's a much easier way of scrapbooking.   For my project life album, I document a week at a time.  It really shows more of my daily life than my previous scrapbooks did; they generally only showed specific events. 


 I'm excited to continue, change and expand upon my Project Life albums.  Please comment with any questions that you may have about this scrapbook style, and I will try to do my best to answer them!